今天 Spring Cloud 的 Finchley 版本终于 Release Candidate 1 了(详见Spring Cloud Finchley.RC1 Has Been Released )。众所周知,Spring Cloud 服务间的调用方式是使用的 RESTful API,我们平时都是RestTemplate或Feign来调用的,这两种方式其实说到底都是同步的方式。
之前我们已经了解过了 Spring 5 的一个新特性——响应式编程。那么我们能不能在 Spring Cloud 的服务间调用的时候也用这种异步非阻塞的方式呢?随着 Spring Cloud Finchley 的发布,这一切均可以实现。
本文我们就用 WebFlux、Spring Data Reactive 从头到脚构建一个响应式的微服务。
准备 为了完成这个示例,我们需要:
服务注册中心:我们要用到服务发现和服务注册,这里用一个单节点的 Eureka Server 来做。
两个微服务:帐户服务和客户服务。每个微服务都有自己的数据库,且对外暴露简单的响应式 API ,用于检索和存储数据。另外,客户服务与帐户服务可以相互通信,以获取客户的所有帐户,并通过客户服务 API 方法返回。
数据库:因为现在还没几个数据库有实现了反应式数据访问的可用驱动,Spring Data Reactive 目前仅支持 MangoDB、Redis 和 Cassandra,简单起见我们就用 MangoDB。MangoDB 我这里使用 Docker 来创建,一切均用默认配置(主要是懒 ,这样就不用去改 Spring Boot 的配置文件了)
1 docker run -d --name mongo -p 27017:27017 mongo
本文的完整示例代码可在 Github 中查看
实战 服务注册中心 新建一个基本的 Spring Boot 工程,命名为eureka-server。
pom.xml 中依赖坐标如下:
1 2 3 4 <dependency > <groupId > org.springframework.cloud</groupId > <artifactId > spring-cloud-starter-netflix-eureka-server</artifactId > </dependency >
配置文件 application.yml 配置如下:
1
2
3
4
5
6
7
8
9
10
11
spring: application: name: eureka-server eureka: client: register-with-eureka: false fetch-registry: false service-url: defaultZone: http://localhost:8000/eureka/ server: port: 8000
在启动类上加上@EnableEurekaServer注解
1
2
3
4
5
6
7
8
@EnableEurekaServer @SpringBootApplication public class EurekaServerApplication {public static void main (String[] args) {
账户服务 新建一个基本的 Spring Boot 工程,命名为cloud-account。
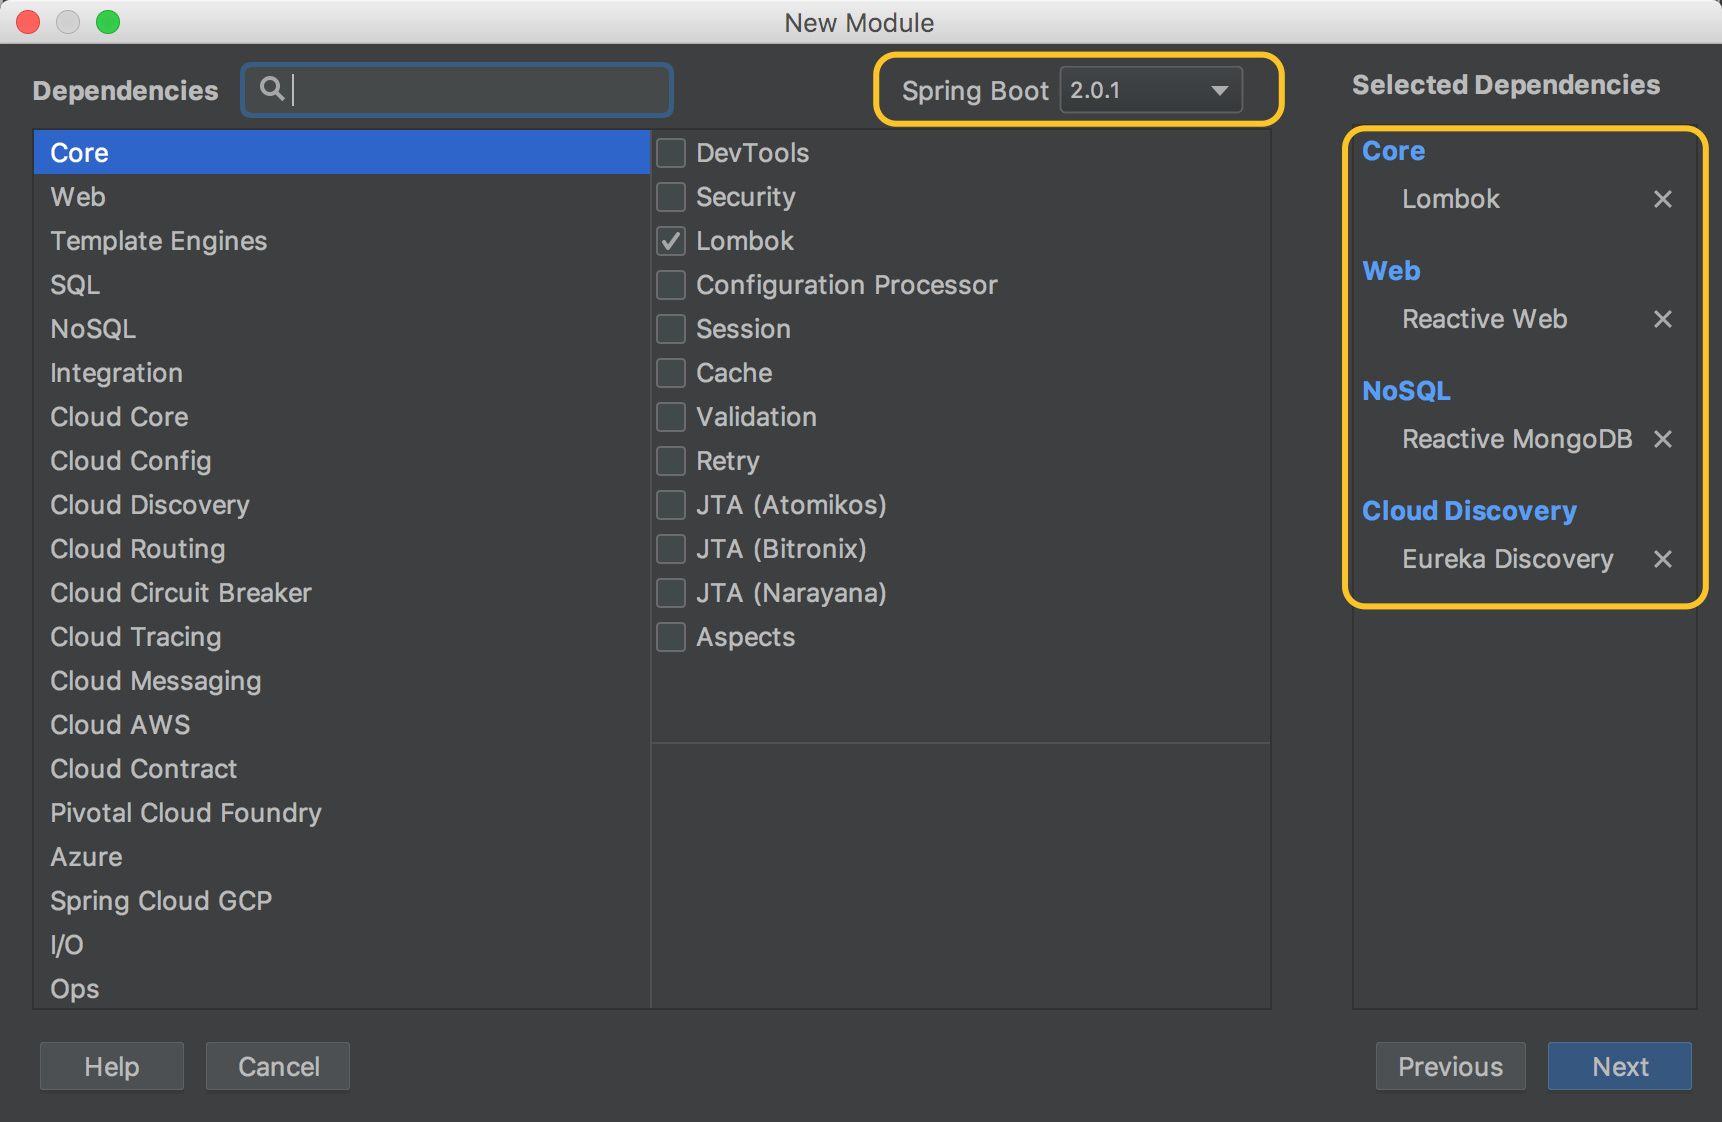
如果是使用 Spring Initializr 话,引入Lombok、Reactive Web、Reactive MongoDB和Eureka Discovery这四个依赖
最终 pom.xml 中应有以下依赖坐标:
1 2 3 4 5 6 7 8 9 10 11 12 13 14 15 16 17 18 19 20 21 22 <dependency > <groupId > org.springframework.boot</groupId > <artifactId > spring-boot-starter-data-mongodb-reactive</artifactId > </dependency > <dependency > <groupId > org.springframework.boot</groupId > <artifactId > spring-boot-starter-webflux</artifactId > </dependency > <dependency > <groupId > org.springframework.cloud</groupId > <artifactId > spring-cloud-starter-netflix-eureka-client</artifactId > </dependency > <dependency > <groupId > org.projectlombok</groupId > <artifactId > lombok</artifactId > <optional > true</optional > </dependency > <dependency > <groupId > io.projectreactor</groupId > <artifactId > reactor-test</artifactId > <scope > test</scope > </dependency >
配置文件 application.yml
1
2
3
4
5
6
7
8
9
spring: application: name: cloud-account server: port: 8100 eureka: client: service-url: defaultZone: http://localhost:8000/eureka/
创建账户的实体类,其中@AllArgsConstructor、@NoArgsConstructor和@Data都是 Lombok 提供注解,不了解的可以自行学习,这里不多说了。
1
2
3
4
5
6
7
8
9
10
@AllArgsConstructor @NoArgsConstructor @Data @Document(collection = "accounts") public class Account {@Id private String id;private String customerId;private Double amount;
我们使用 Spring Data Reactive。与非响应式 Spring Data 的CrudReposity对应的,响应式的 Spring Data 也提供了相应的 Repository 库:ReactiveCrudReposity,我们也可以使用它的子接口ReactiveMongoRepository
1
2
3
public interface AccountMongoReactiveRepository extends ReactiveCrudRepository <Account, String> {findByCustomerId (String customerId) ;
为账户服务创建对应的 Controller,这里只简单提供一个查询客户的所有账户的接口。为了在后面测试负载均衡,这里加上了调用时间戳的打印。
1
2
3
4
5
6
7
8
9
10
11
12
13
14
@RequestMapping("/account") @RestController public class AccountController {@Autowired private AccountMongoReactiveRepository repository;@GetMapping("/customer/{customer}") public Flux<Account> findByCustomer (@PathVariable(name = "customer") String customer) {"Customer => " + customer + " [ " + LocalDateTime.now().format(DateTimeFormatter.ofPattern("HH:mm:ss.SSS" )) + " ]" );return repository.findByCustomerId(customer);
客户服务 新建一个基本的 Spring Boot 工程,命名为cloud-customer,POM 依赖和之前的cloud-account的一模一样。
配置文件如下,仅是改了服务名和端口号:
1
2
3
4
5
6
7
8
9
spring: application: name: cloud-customer server: port: 8200 eureka: client: service-url: defaultZone: http://localhost:8000/eureka/
创建一个 Customer 的实体类
1
2
3
4
5
6
7
8
9
10
@Data @AllArgsConstructor @NoArgsConstructor @Document(collection = "customers") public class Customer {@Id private String id;private String name;private String mobile;
数据访问层直接继承ReactiveCrudRepository我们便有了基本的 CRUD 能力
1
2
public interface CustomerMongoReactiveRepository extends ReactiveCrudRepository <Customer, String> {
因为我们只是示例,不做复杂的业务逻辑,所以省略了 Service 层,在 Controller 里边直接将 CRUD 的操作代理给了 Repository。
1
2
3
4
5
6
7
8
9
10
11
12
13
14
15
16
17
18
19
20
21
22
23
24
25
26
27
28
29
30
31
32
33
34
@RestController @RequestMapping("/customer") public class CustomerController {@Autowired private CustomerMongoReactiveRepository repository;@Autowired private WebClient.Builder webClientBuilder;@GetMapping("") public Flux<Customer> list () {return repository.findAll();@GetMapping("/{id}") public Mono<Customer> get (@PathVariable String id) {return repository.findById(id);@PostMapping("") public Mono<Customer> create (@RequestBody Customer customer) {return repository.save(customer);@PutMapping("/{id}") public Mono<Customer> update (@PathVariable("id") String id, @RequestBody Customer customer) {return repository.save(customer);@DeleteMapping("/{id}") public Mono<Void> delete (@PathVariable String id) {return repository.deleteById(id);
到这里,我们的服务注册中心和两个微服务就都好了。但是,这两个微服务之间还是完全独立的,没有相互间的服务调用。现在我们来实现之前说的需求:客户服务与帐户服务可以相互通信,以获取客户的所有帐户,并通过客户服务 API 方法返回。
首先创建一个 Java Config,这里我们不再使用RestTemplate 来调用服务,而是WebClient。这个配置看起来和注册RestTemplate时差不多,但是要注意这里注册的 Bean 是WebClient.Builder。
1
2
3
4
5
6
7
8
9
10
@Configuration public class WebClientConfig {@Bean @LoadBalanced public WebClient.Builder loadBalancedWebClientBuilder () {return WebClient.builder();
除了这种写法,还有一种写法是
1
2
3
4
5
6
7
8
9
10
11
12
13
14
public class MyClass {@Autowired private LoadBalancerExchangeFilterFunction lbFunction;public Mono<String> doOtherStuff () {return WebClient.builder().baseUrl("http://cloud-account/account" )"" )
下边的是错误的写法,会抛出异常
1
2
3
4
5
@Bean @LoadBalanced public WebClient loadBalancedWebClient () {return WebClient.builder().baseUrl("http://cloud-account/account" ).build();
然后在CustomerController实现这个端点:
1
2
3
4
5
6
7
@GetMapping("/{id}/account") public Flux<Account> getAllAccounts (@PathVariable String id) {return webClientBuilder.baseUrl("http://cloud-account/account/" ).build()"/customer/" + id)
这里需要在cloud-customer里创建一个 DTO Account,因为和cloud-account里的完全一样,就省略了。
测试 同时启动两个cloud-account服务
然后不断请求 http://localhost:8200/customer/5ae15fa640f1687f200d8941/account 接口,从下图的时间戳可以看出 WebClient 会轮流请求两个服务,达到了负载均衡的效果。
总结 这一节,我们从服务提供、服务调用、数据访问三个方面均使用了响应式编程(Reactive Programming),可以说是做到了 Full Reactive Stack Backend。相信你对响应式编程及其在 WEB 应用、微服务架构中如何发挥作用有了更多的体会,本章的实战是比较基础的,初衷是希望能够通过上手编写代码体会响应式编程的感觉,因为切换到响应式思维方式并非易事。
我们了解了异步非阻塞的好处,也知道如何让数据流动起来,后面我会通过对实例的性能测试,借助实实在在的数据,真切感受一下异步非阻塞的 “丝滑”。
参考 Spring Cloud Spring Cloud Finchley.RC1 Has Been Released Full Reactive Stack with Spring Boot WebFlux Spring Framework 5.0 的响应式微服务